Picture that Fish
Fishing and photographs seem to go hand in hand. We live in a visual world, so it makes sense that photographing our fishing outings is a common practise. Social media is full of still and video presentations of fishing adventures. From the grip and grin photos of a fish caught to artistic representations of the experience, the range of material is virtually endless.
I happen to enjoy photography so generally consider some form of camera an essential part of my fishing gear. I am more serious about the process of photography than many. But am a far cry removed from some of the very skilled and creative photographers out there.
Regardless of your skill level or even passion for it, I’d like to talk a bit about how a few simple steps can enhance your fishing photo taking.
Photographing the experience.
Why photograph?
Photographing my fishing trips has several benefits:
Capture memories of my experience – just one photograph can bring back memories of a past trip. It could be of the fish, the friends I shared the day with, unique events such as weather, wildlife, or the food we ate.
Helps to document key information – was there something about the access or launch conditions, reminders of favorite spots along the lake, what flies did I use. All of these serves as reminders should I wish to return to the same location. And for those really trustworthy friends, maybe help for them to plan their own trip.
Allows me to share my experience with others – often this means sharing a photo of a friend I fished with that day, or perhaps others who are interested in seeing/hearing about the day or trip.
On an adventure in search of landlocked salmon.
Equipment
Fishing photography does not have to be complicated. Most of us carry more than enough camera power in our smart phone. If your photographic interests grow, options range from dedicated point and shoot cameras to more complex systems that give you a wider range of control over the photo process. Like fishing itself, there is no limit to the amount of photography gear you could buy – of course, because you just need it.
I generally have my mobile phone with me and depending on whether I am wading or in my float tube, I may also bring another camera with me.
One of the most important considerations is protecting your camera from the water. My DSLR is weather proofed but not completely water resistant, so I am taking chances bringing it along but it’s a risk I choose to take.
Many of today’s smart phones are designed with a level of water resistance but in my experience that doesn’t mean they are fully waterproof. If you choose to do so, consider the IP rating of your camera. IP is short for ingress protection, meaning its ability to resist stuff like dirt and water.
I own an iPhone XR which has an IP67 rating. This means it is rated a level 6 for dust protection (total protection) and 7 for water resistance (can be submerged to one metre for a limited time). This gives me some comfort, but I also use a waterproof sleeve for my iPhone. It is a bit clunky but does the trick and allows me to use the touch screen through the cover.
If you are looking for full waterproof capability, this link from PC Magazine provides a good summary of cameras you might want to consider - https://www.pcmag.com/picks/the-best-waterproof-cameras-for-2020.
While on the subject of water and dirt, having a cloth available to keep your lens clean is useful. Look for a material that is soft, absorbent, and lint-free.
Some Tips for Better Photos
So you have a camera with you. Now what? A few suggestions to ensure the photo you take captures the moment.
Hold steady – find a way to brace yourself if possible. At the very least keep your camera close to your body. Shaky camera holding leads to out of focus shots.
Take a moment to compose your shot
Look for distractions in the scene – In the interest of ensuring the fish is out of water for as little time as possible, we move quickly to get the shot. This is good but sometimes this means we overlook details like a rod across the image, the horizon being at a weird angle, etc. I can be helpful to quickly survey the scene before bringing the fish into the scene to look for these distractions and position the camera to minimize their impact.
Try to position yourself so the sun is behind you – Doing so reduces the chance your sky light will be blown out or your camera will compensate for a bright sky with the result that your main subject will be under exposed. If you can’t position yourself suitably, tilt your camera downwards, minimizing the amount of sky in your image.
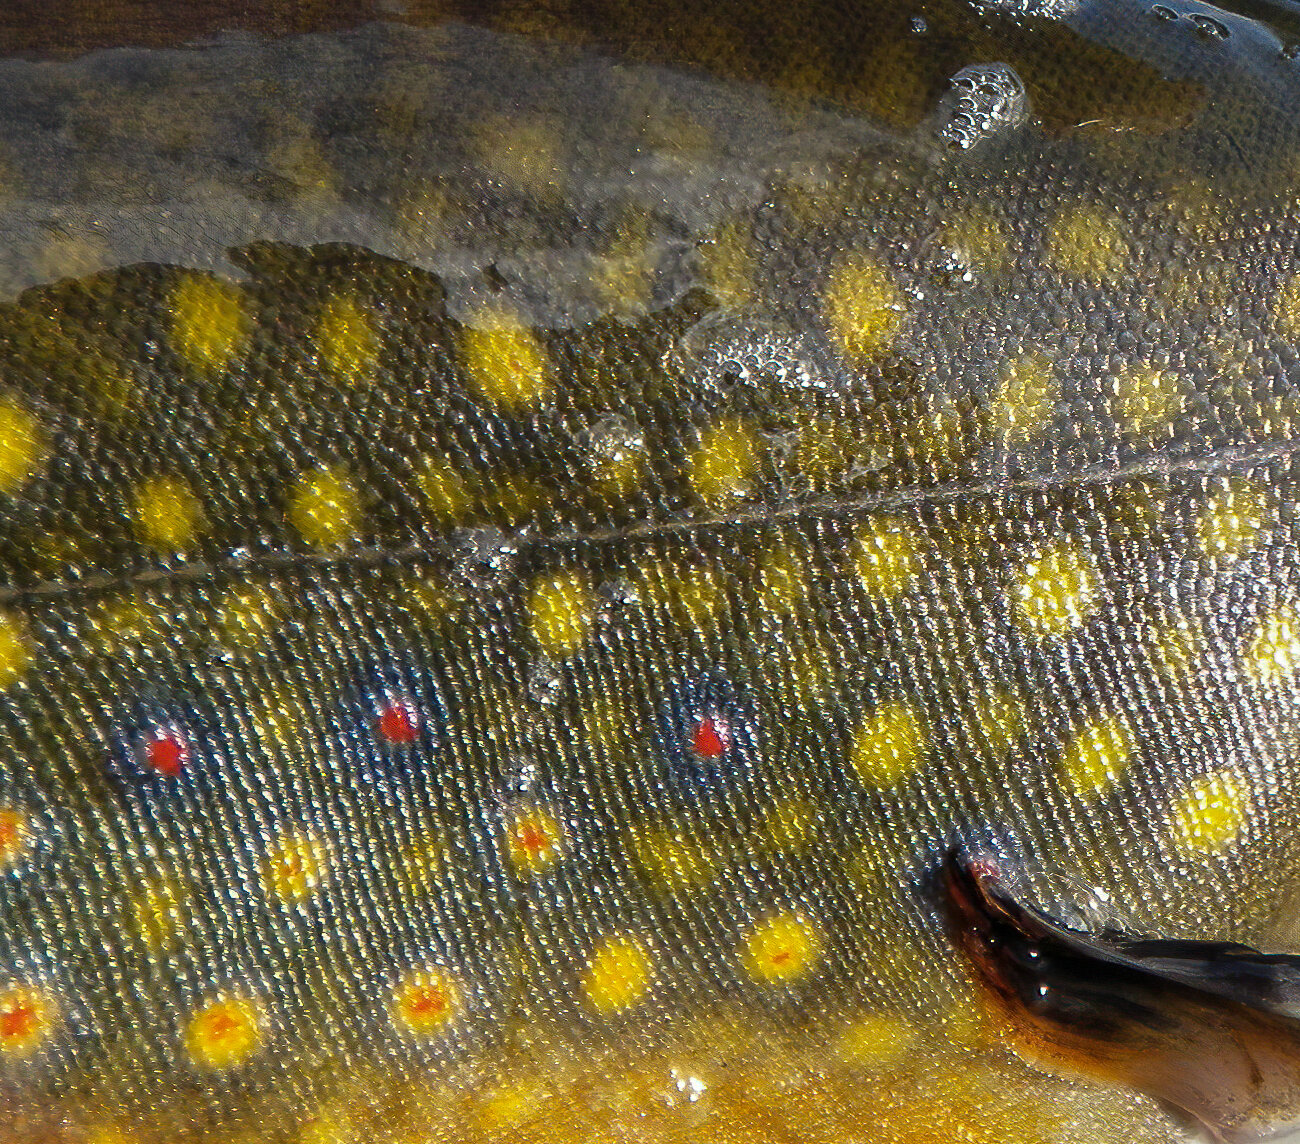
Get in close
Our brain tends to focus our attention on the fish or whatever our subject of interest may be. We tend to ignore all the extraneous information in the scene. The camera does not do the same thing and as a result when we look at our photo later, we wonder why the main subject is so small, far away and unimpressive. So, try to get as close as possible.


Look for interesting features to add uniqueness to your images: colours, shapes, fish details, reflections, etc.

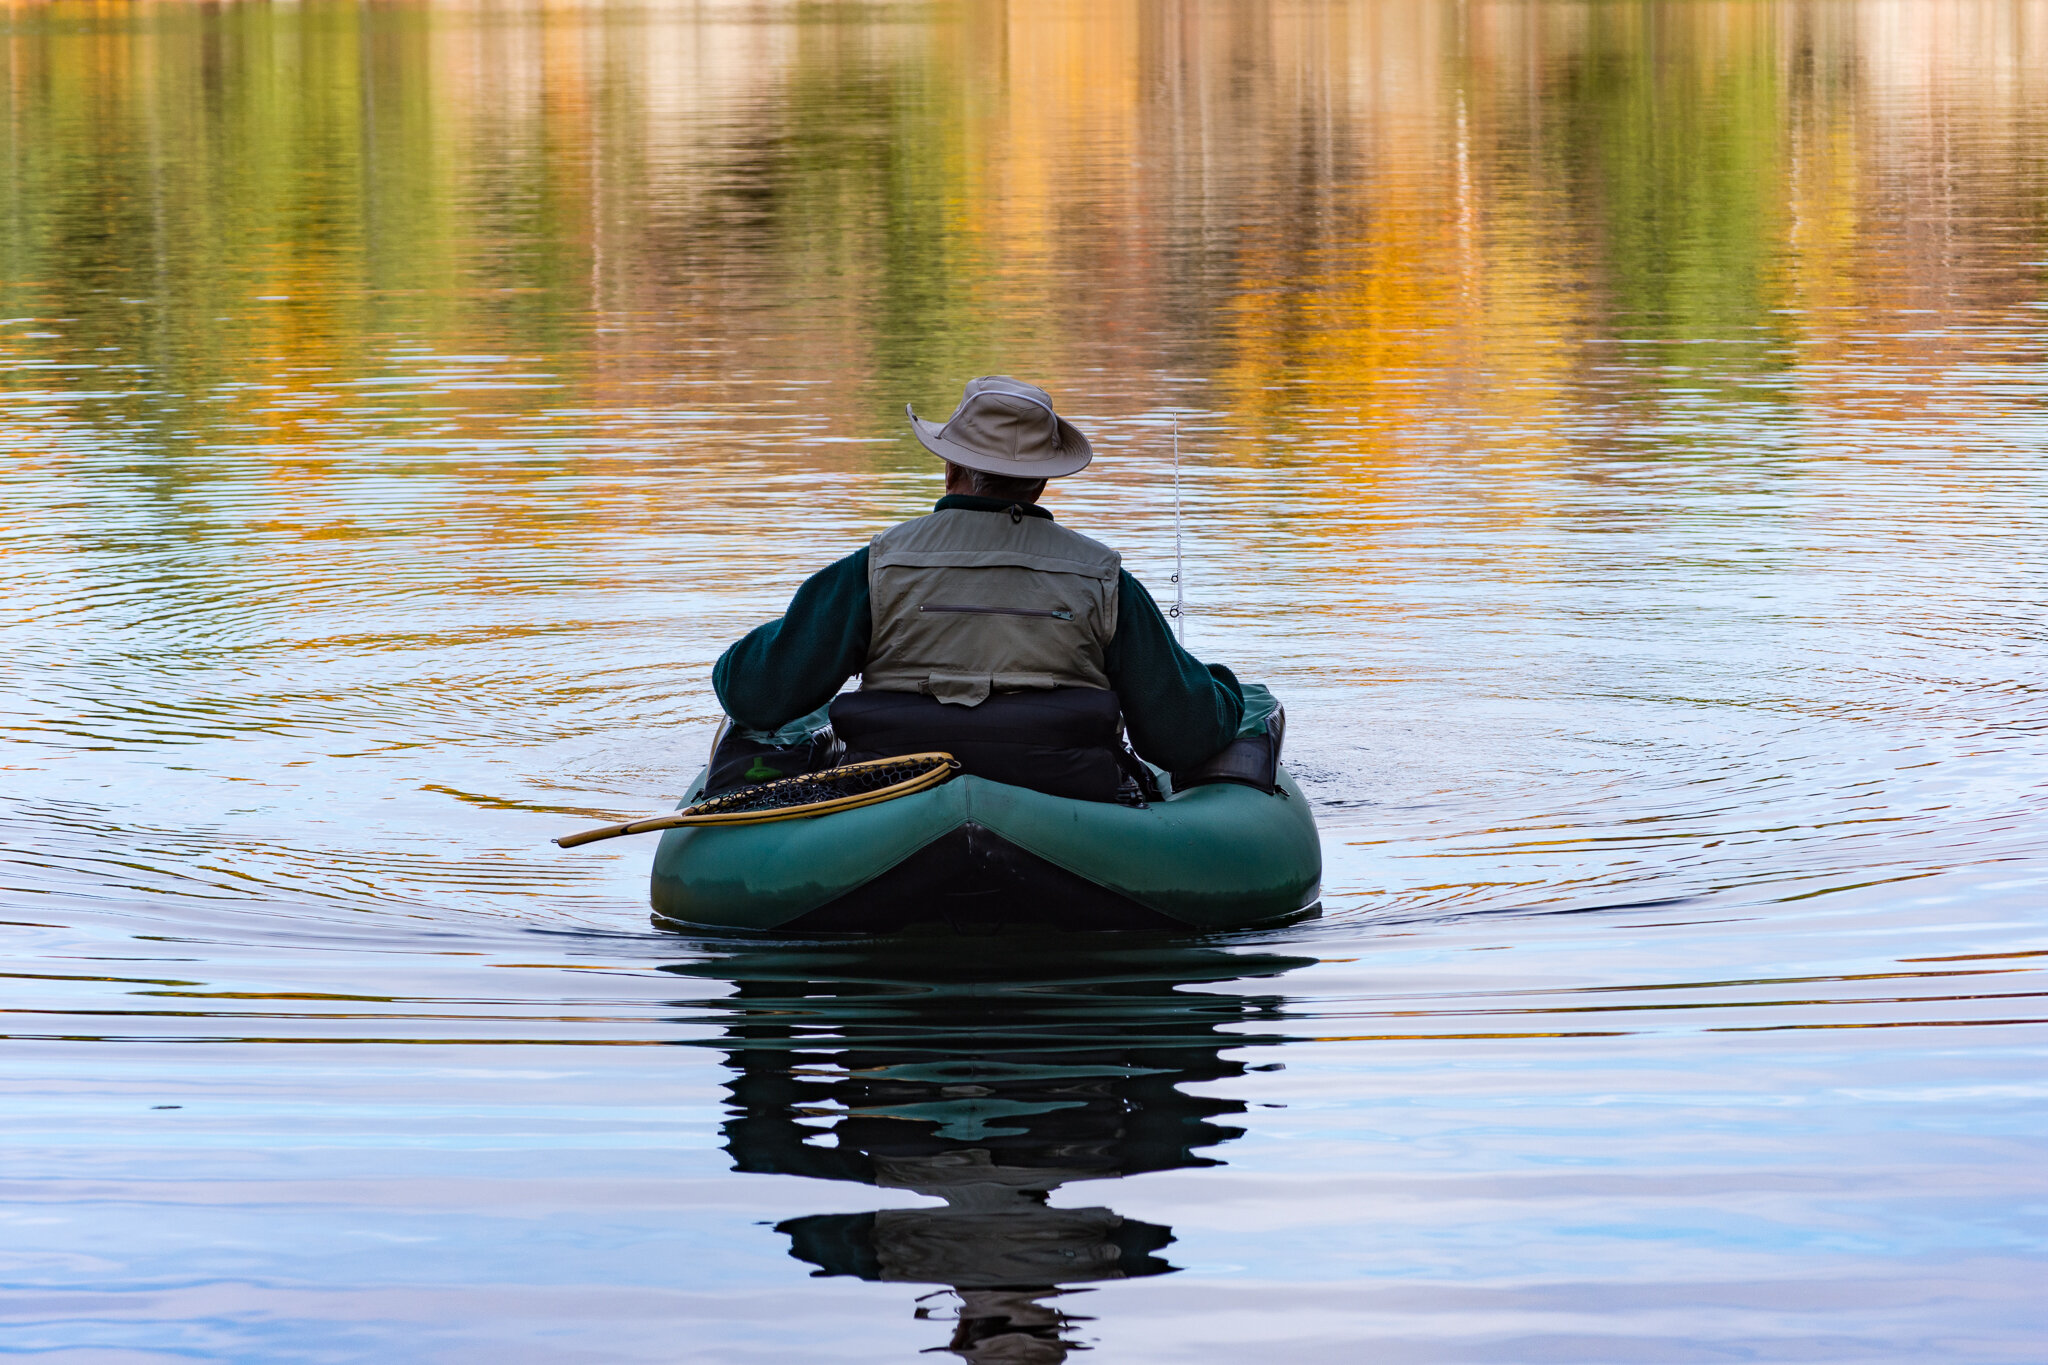

Don’t forget the surroundings
The surroundings make up a big part of the fishing experience.

Capture photos of people fishing, playing the fish, netting the fish, sleeping in the boat, whatever…
Fish Health
I’ll mention again, while capturing an image of the fish is our focus, it shouldn’t be done at the expense of the fish’s health. There are things that can be done to ensure this is not the case:
Handle the fish with care. Keep fingers out of the fish’s gills
Wet your hands before you handle a fish
Minimize time the fish is out of the water, consider photos with fish in the net or at the waterline.
So get out fishing, and bring home some pics!